Descripción
Modelo de producto
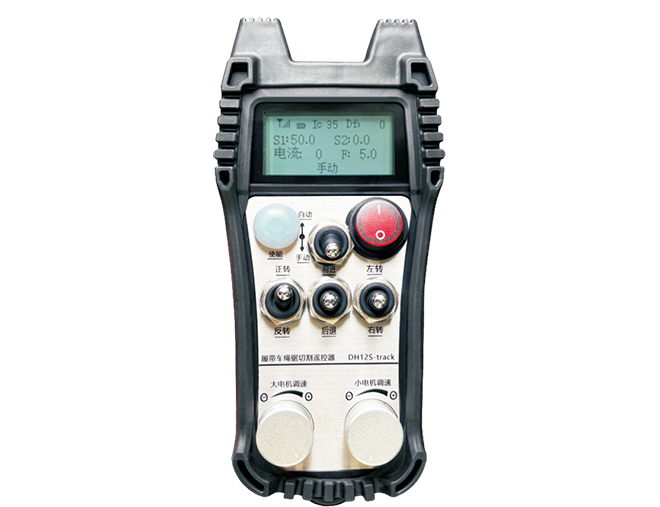
Modelo: DH12S-LD
Equipo aplicable:máquina de sierra de alambre sobre orugas
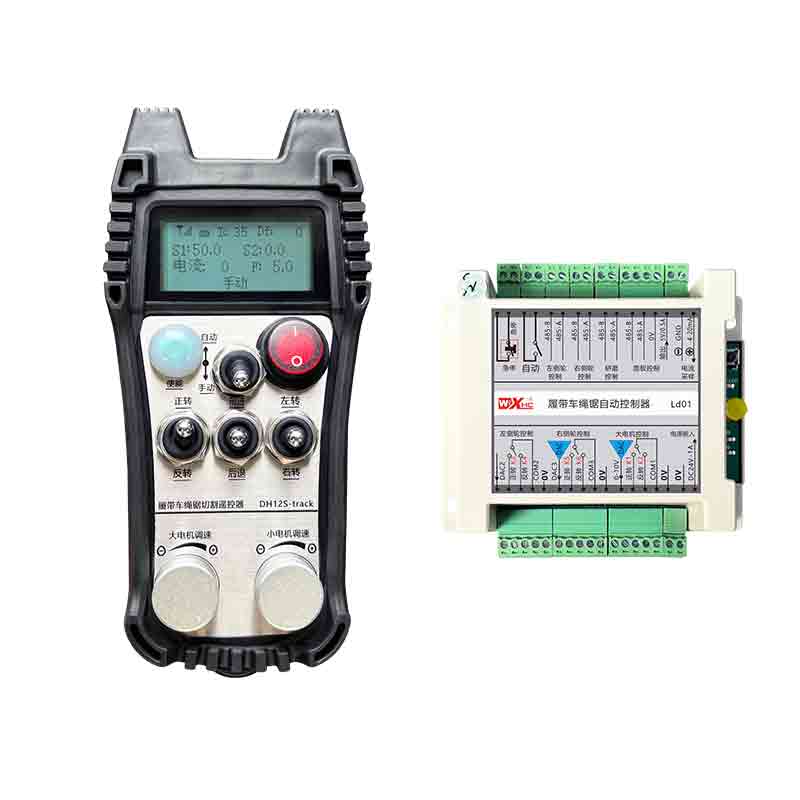
Diagrama de accesorios de productos
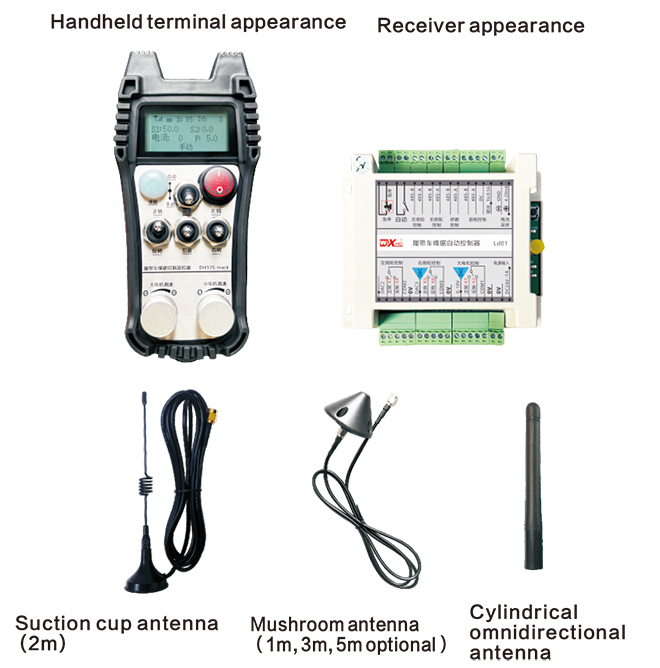
Nota: Puedes elegir una de las tres antenas. La antena de la copa de succión es estándar de forma predeterminada.
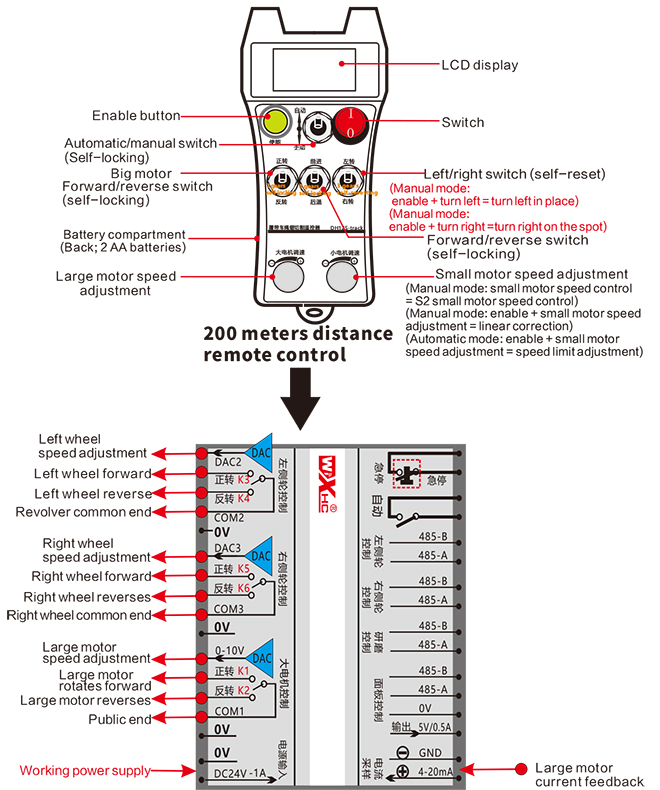
Descripción del interruptor de control remoto
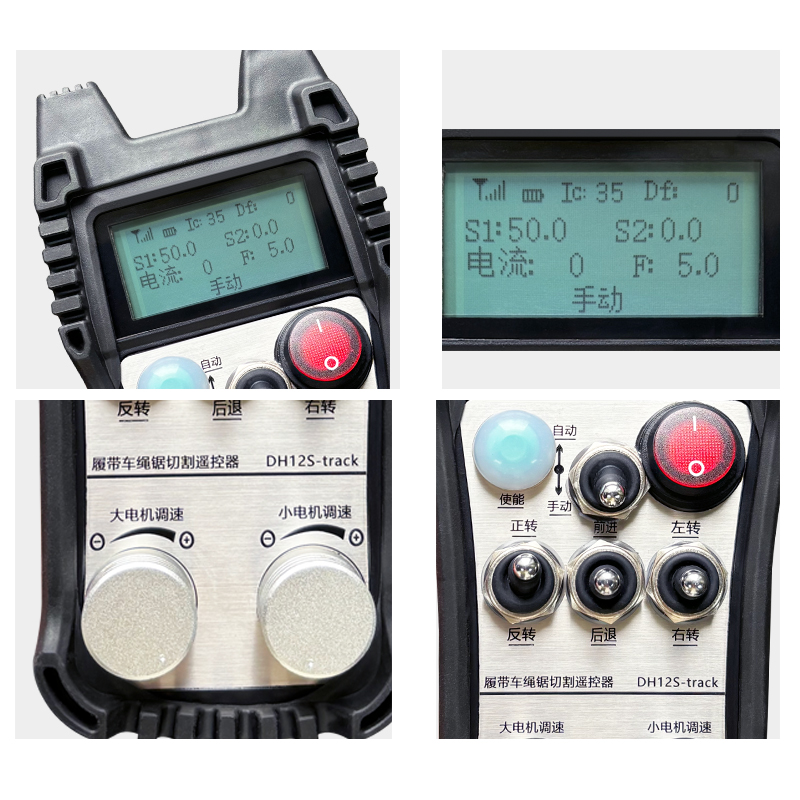
Introducción al contenido de la pantalla

Gran velocidad del motor:T1:0-50
Velocidad del motor pequeño: T2: 0-50
Límite de velocidad máxima del motor pequeño de corte automático:F:0-30(parámetros ajustables)
Corriente máxima de corte automático.: ic: 0-35 (parámetros ajustables)
Valor de corrección lineal: df: -99-99 (1 La unidad es de aproximadamente 0,02 V.)

Bajo voltaje: La batería del control remoto está demasiado baja, por favor reemplace la batería.

Red caída: La señal inalámbrica está interrumpida.. Comprueba la potencia del receptor., enciéndelo de nuevo, y reinicie el control remoto.
Instrucciones de funcionamiento de la función de control remoto
1.Enciende el control remoto
Cuando el está encendido, La luz RF-LED del receptor comienza a parpadear.;Instale dos pilas AA en el control remoto del tresreceptor., Encienda el interruptor de encendido, Y la pantalla mostrará la velocidad del motor., indicando una startup exitosa.
2.Gran motor y regulación de velocidad.
Gire el “adelante/atrás” cambiar a adelante, El gran motor del receptor se encenderá., y la pantalla mostrará adelante
Gire el “adelante/atrás” cambiar a reversa, el gran motor del receptor se encenderá al revés, y la pantalla mostrará reversa
Gire el “ajuste de velocidad del motor grande” Perilla para ajustar el voltaje de salida de ajuste de velocidad del motor grande del receptor 0-10V;
3.Motor pequeño y regulación de velocidad.
Mueva el “adelante/atrás” cambiar a adelante, La rueda izquierda hacia adelante y la rueda derecha hacia adelante del receptor están encendidas., y la pantalla muestra adelante 
Gire el “Adelante/Reversa” cambiar a reversa, La marcha atrás de la rueda izquierda y la marcha atrás de la rueda derecha del receptor están activadas., y la pantalla muestra reversa
4.Gira a la izquierda y a la derecha
Gire el “Izquierda/Derecha” cambiar a la izquierda, La rueda derecha del receptor avanzará y se encenderá.,y la pantalla mostrará hacia la izquierda
Gire el “girar a la izquierda/derecha” cambiar para girar a la derecha, La rueda izquierda del receptor avanzará y se encenderá., y la pantalla mostrará girar a la derecha
5.girar en su lugar
En modo manual:
Gira a la izquierda en el lugar: Mantenga presionado el “Permitir” botón, gire el “Giro a la izquierda/derecha” cambiar a la izquierda, La rueda izquierda hacia atrás y la rueda derecha hacia adelante del receptor están encendidas.,y comenzar a girar a la izquierda en el lugar;
Gira a la derecha en el lugar: Mantenga presionado el “Permitir” botón, gire el “Giro a la izquierda/derecha” cambiar a la derecha, La rueda izquierda hacia adelante y la rueda derecha hacia atrás del receptor están encendidas., y el receptor comienza a girar hacia la derecha en su lugar;
6.Ajuste del límite de velocidad del motor pequeño
En modo automático: mantenga presionado el “Permitir” y gire el botón “Ajuste de velocidad del motor pequeño” para ajustar la velocidad máxima del motor pequeño durante el corte automático;
7.Corte automático
El primer paso es arrancar el motor grande.; el segundo paso es cambiar el interruptor de modo a “Auto”; El tercer paso es arrancar el motor pequeño y la pantalla mostrará “Corte automático”,indicando que ha entrado en modo de corte automático;
8. Corrección en línea recta
Cuando los motores para caminar izquierdo y derecho se mueven hacia adelante y hacia atrás, las velocidades izquierda y derecha son inconsistentes, y la marcha en línea recta se desvía. Puede utilizar la función de corrección lineal del control remoto para ajustar la velocidad de las ruedas izquierda y derecha.;
Principio de corrección: A través de la función de corrección., la velocidad de la rueda izquierda se ajusta para alcanzar la misma velocidad que la rueda derecha, para sincronizar la velocidad de las ruedas izquierda y derecha y eliminar la desviación;
Método de operación de corrección de desviación: En modo manual, mantenga presionado el “Permitir” y gire el botón “Regulación de velocidad de motores pequeños”;
Gire en el sentido de las agujas del reloj para aumentar el voltaje de velocidad de la rueda izquierda y el valor de corrección en la pantalla aumentará;
Gire en sentido contrario a las agujas del reloj para reducir el voltaje de velocidad de la rueda izquierda y el valor de corrección de la pantalla para disminuir.;
Rango de corrección: Valor de corrección -90 a 90; El voltaje de corrección de una unidad de corrección es de aproximadamente 0,02 V.;
9. Menú de parámetros (los usuarios tienen prohibido modificarlo sin permiso)
Algunas funciones del control remoto se pueden ajustar a través de parámetros. En modo manual, cuando la velocidad del motor pequeño S2 es 10, Empuje el interruptor de avance/retroceso hacia arriba tres veces seguidas., y luego empújelo hacia abajo tres veces seguidas para ingresar al menú de parámetros;
Salir del menú de parámetros: Elija guardar o no guardar, luego presione el botón habilitar para confirmar la salida;
Corriente máxima: La corriente nominal de funcionamiento del motor de corte es 80% de esta corriente;
Parámetros de control de velocidad: parámetros de control de corte automático, por defecto 800, la modificación está prohibida;
Parámetro de desaceleración: parámetro de control de corte automático. Cuando el valor de cambio de corriente de corte excede este valor,comienza la desaceleración.
Aceleración a1: parámetro de control de corte automático, cuando la corriente de corte es menor que la corriente de corte establecida, la velocidad de aceleración;
Deceleración a2: parámetro de control de corte automático, cuando la corriente de corte es mayor que la establecida
corriente de corte, la velocidad de desaceleración;
Retracción automática de la cuchilla: inválido;
Iniciar autobloqueo: 0, sin autobloqueo; 1, autobloqueo. Presione la tecla habilitar + avance y retroceso para surtir efecto y autobloqueo.
Caminata máxima: la velocidad máxima del motor pequeño.
Corriente de corte: Establecer la corriente máxima del motor principal para corte automático.. Si la corriente de retroalimentación excede este valor, comenzará a desacelerar.
Límite de velocidad predeterminado: la velocidad máxima predeterminada de la velocidad de corte automático al encender la máquina.
Modo automático: 0, El interruptor automático se controla automáticamente.; 1, El interruptor automático controla el punto de salida IO automático..
Compensación del límite de velocidad: la velocidad máxima del motor pequeño durante el corte automático.
anfitrión máximo: velocidad máxima del motor grande.
Características eléctricas de control remoto

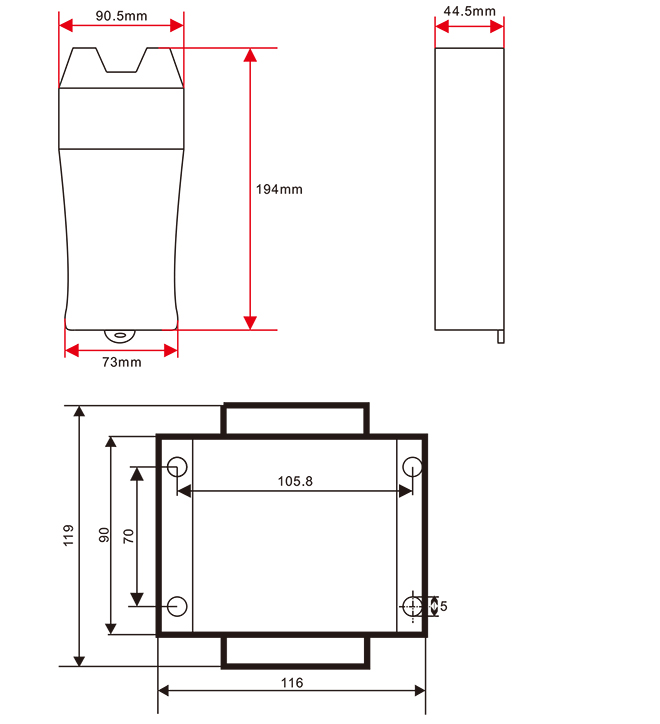
Tamaño de control remoto
El derecho de interpretación final de este producto pertenece solo a nuestra empresa.



-500x650.png)
